Tag Archives: recipes

Curried Tumeric Scrambled Eggs on Toast

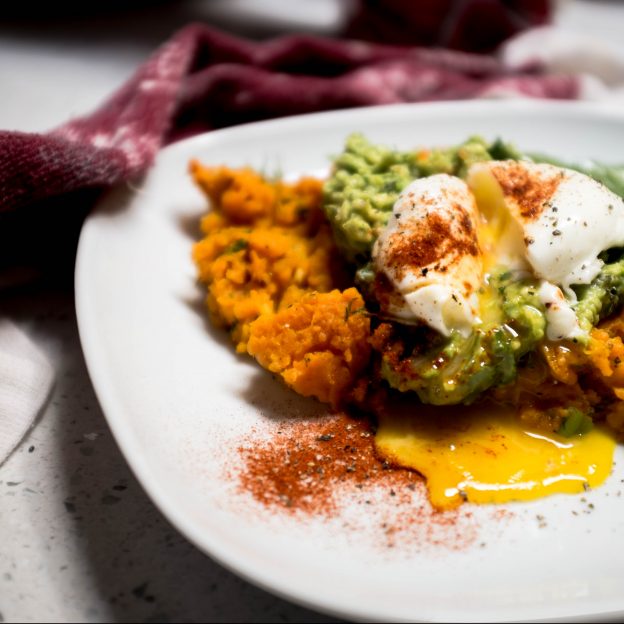
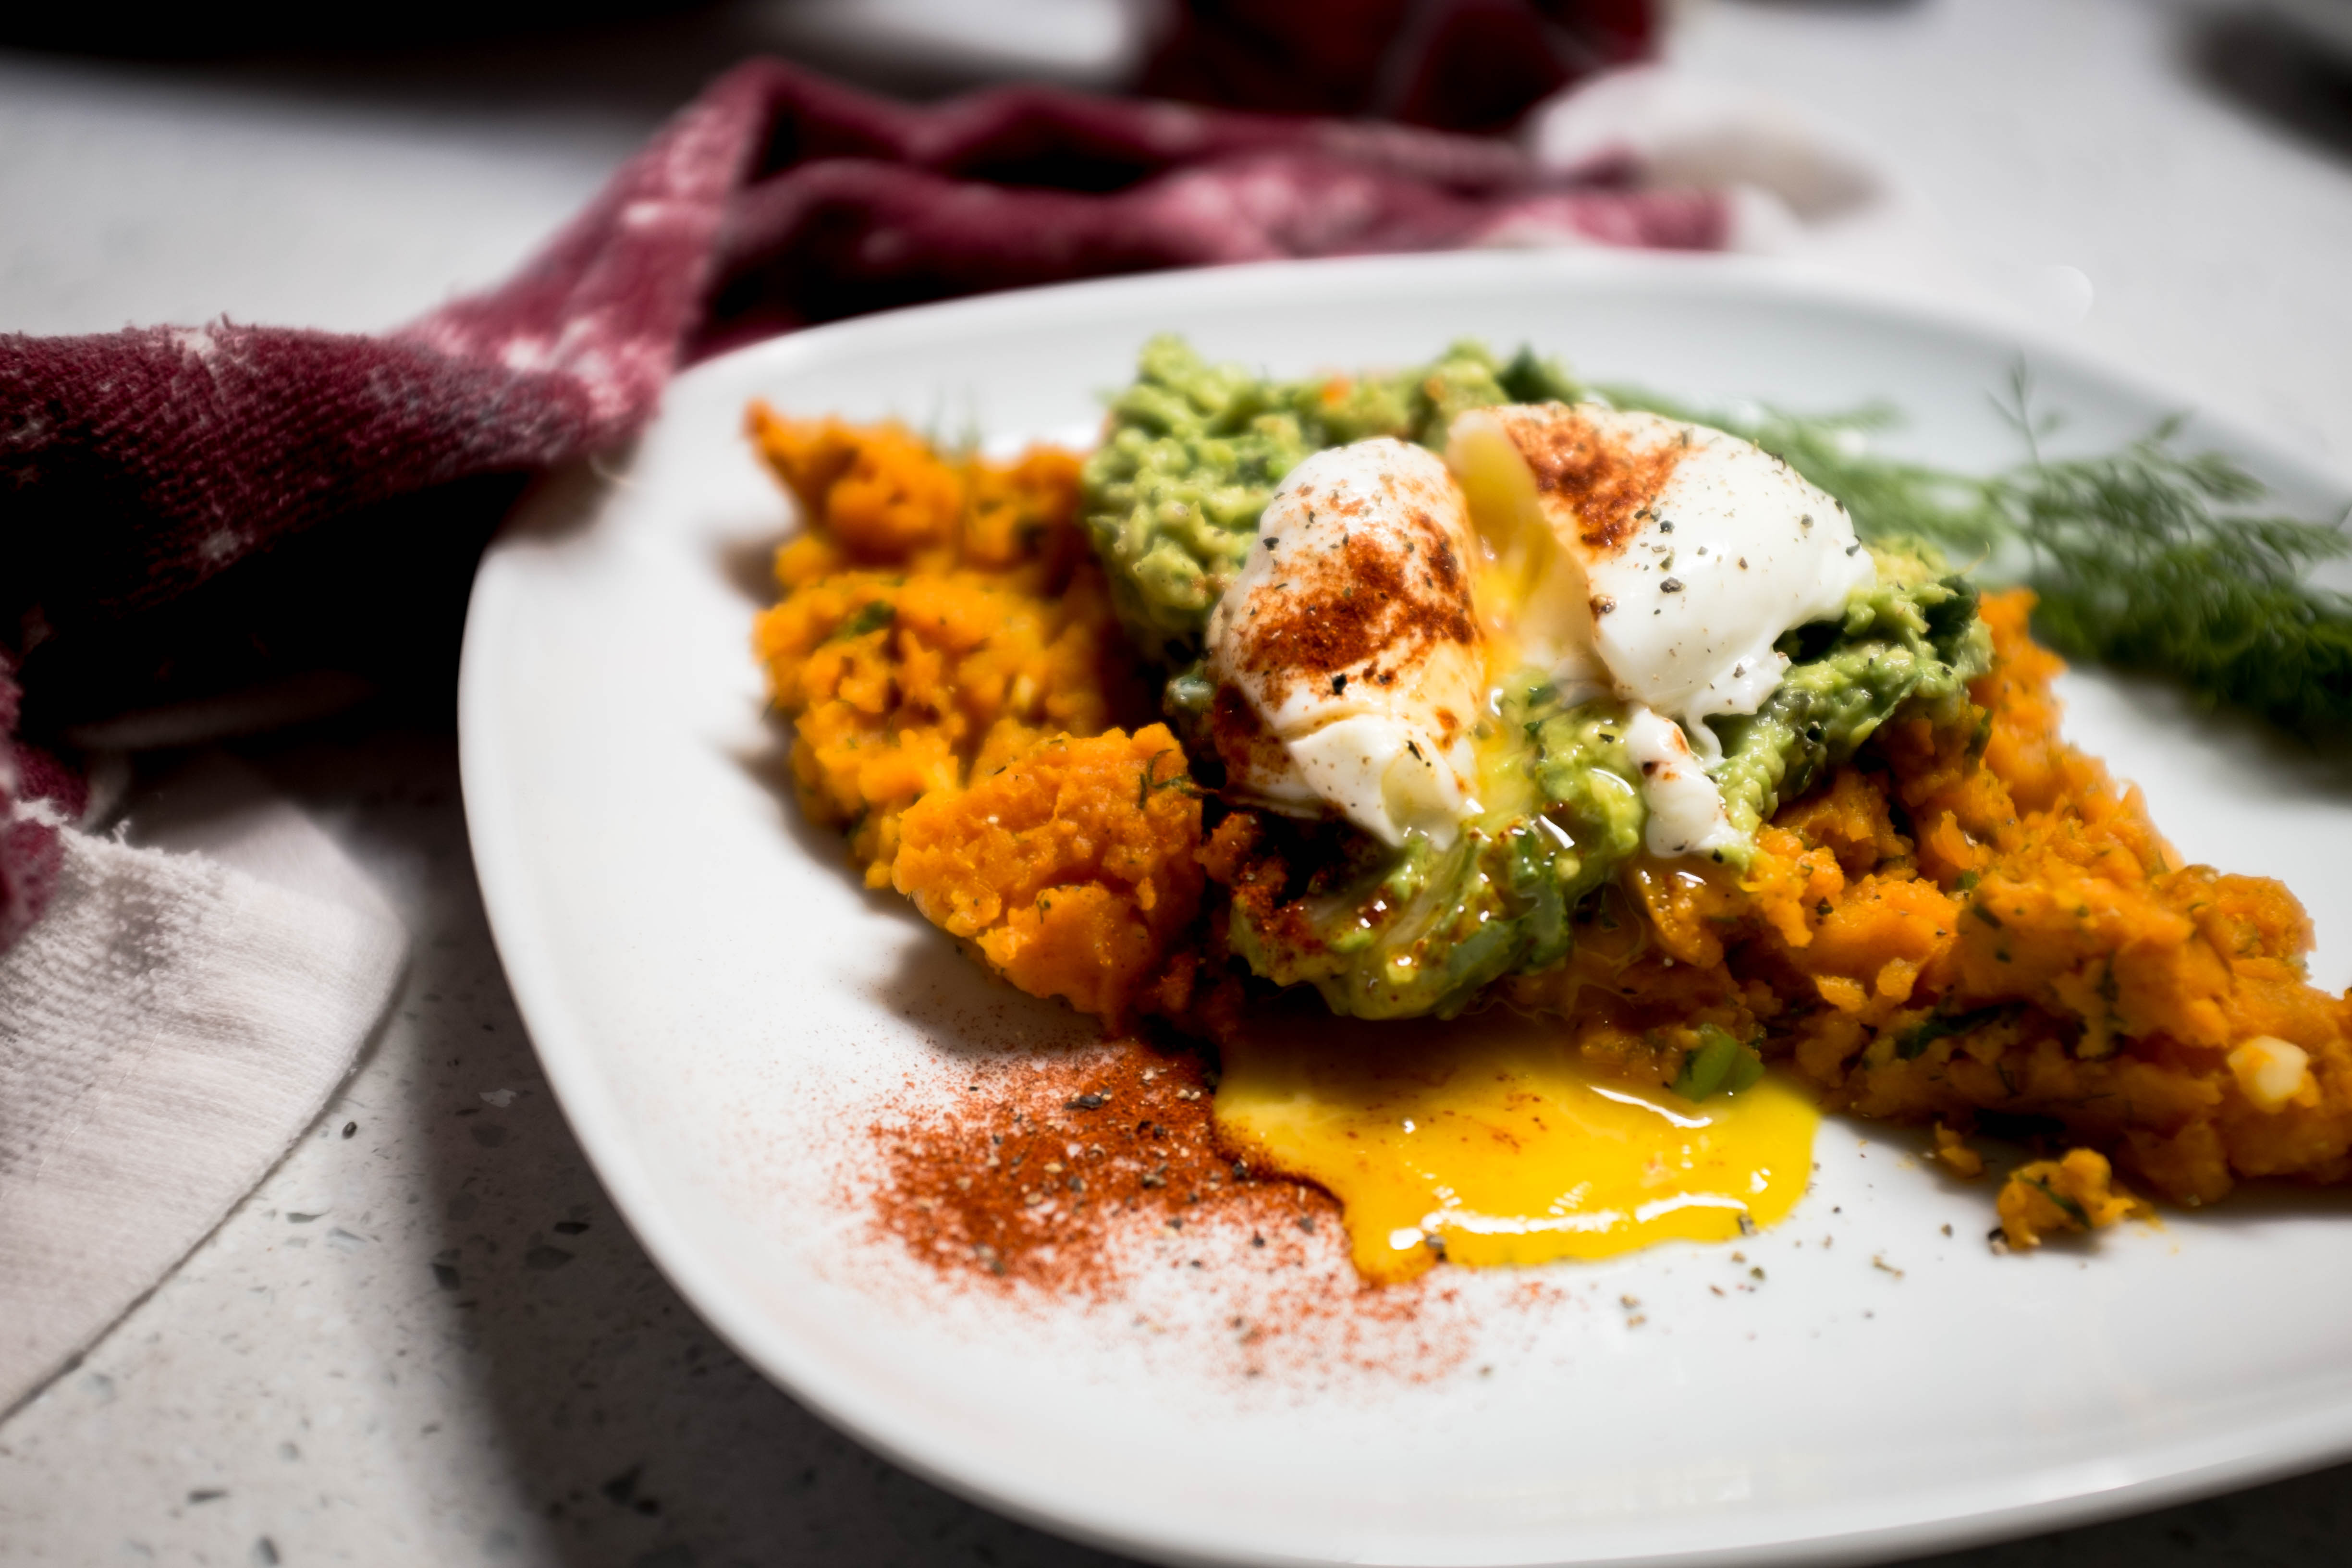
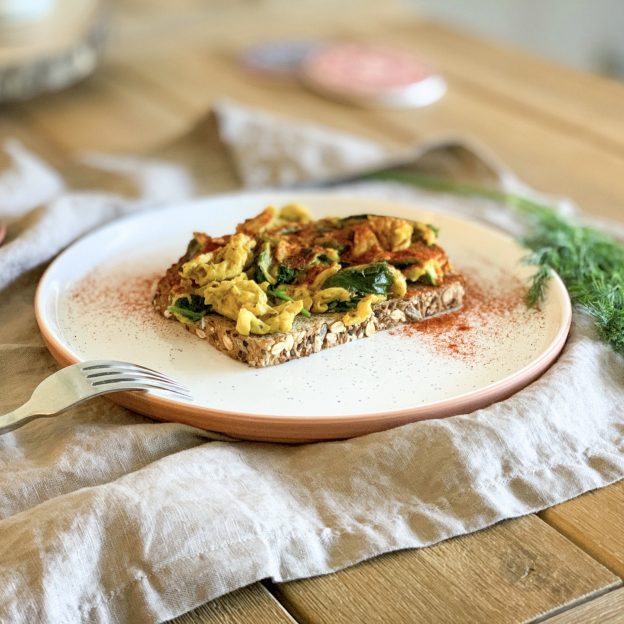
When your roommate looks at your breakfast and remarks, “Wow, how did you make some veggies on eggs and toast look so delicious?”, you figure it’s a good recipe to document on your blog that no one reads 🙂 I make this most often when I want something fast, light, and fresh. Sometimes, I can’t be bothered to make a meal that takes more time and thoughtfulness, but I also don’t want to settle for microwaving leftovers, or turning to a prepackaged energy bar. Elevated eggs and toast falls into the grey area between “I’m lazy” and “I’m a princess”, which is how I feel about most of my meals these days.

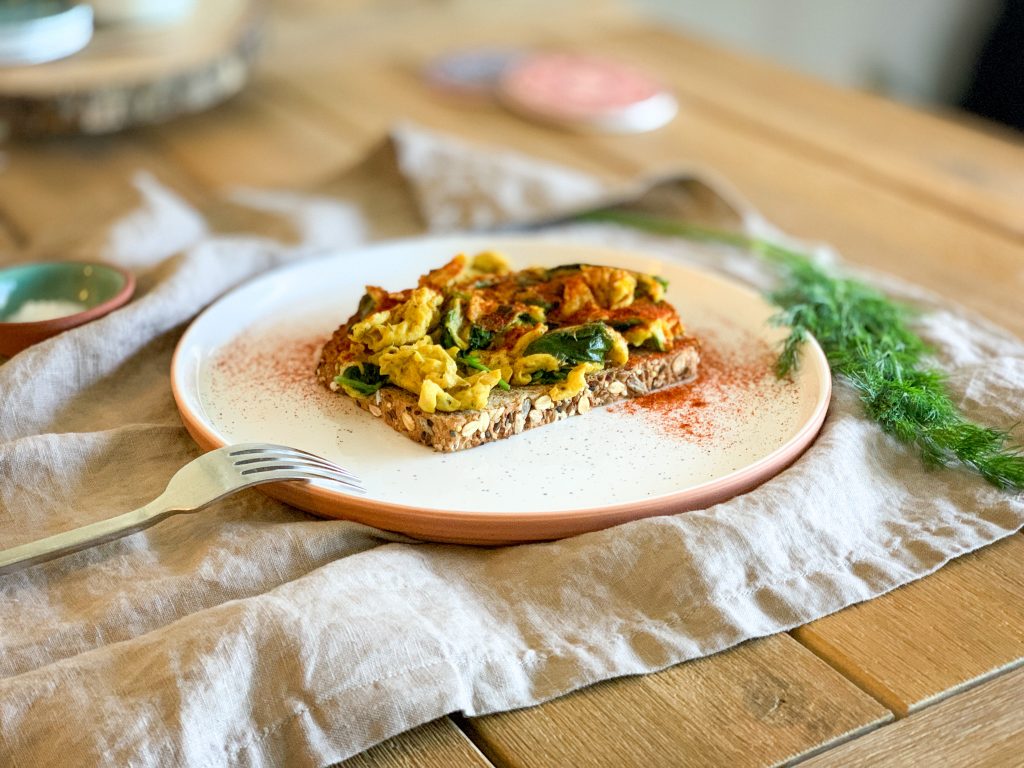
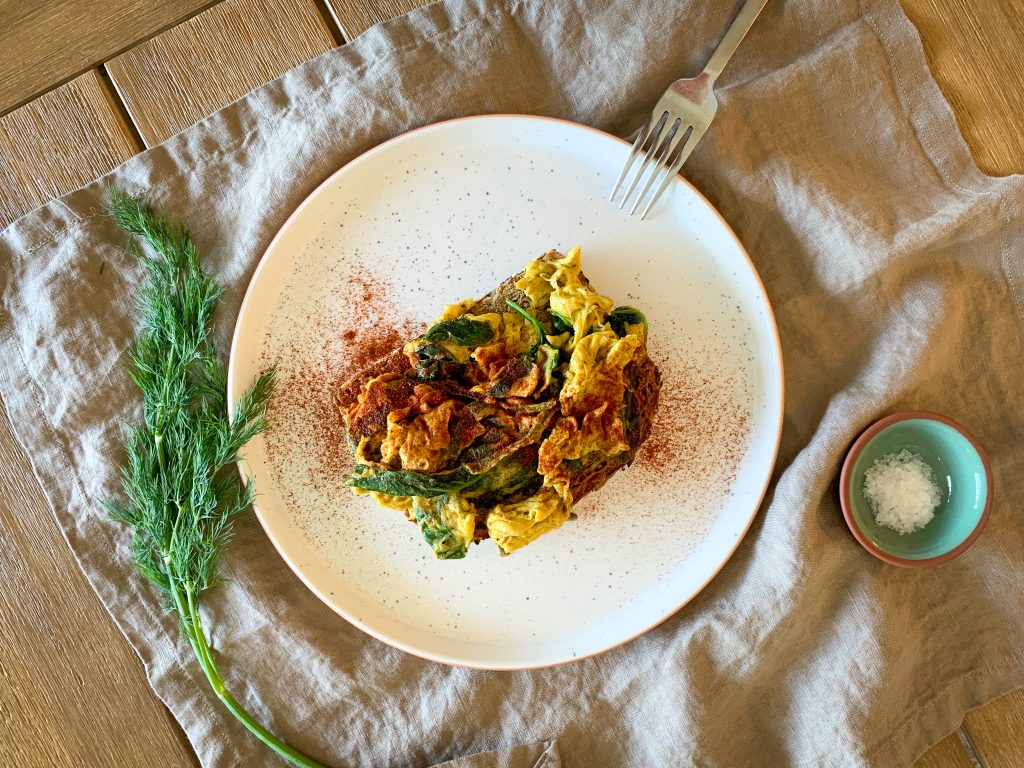
There are few breakfast dishes I love more than the classic eggs and toast, due to how easy it is to make it taste like a sumptuous brunch the newest hipster coffee shop would charge me $14 for (yes Vive la Tarte, I’m speaking to you). My perfect breakfast is cooked so the textures are perfect: I like my eggs just a tad runny, my spinach fairly wilted, and my toast just a light shade of brown. The magic of perfect eggs and toast really comes down to timing cooking each ingredient so they’re all at the right amount of doneness at the same time, and the key to varying how scrambles taste is all in the spices.

Ingredients (for one serving):

  • 1/2 tumeric powder
  • 1 tsp curry powder
  • 1/2 tsp smoked paprika
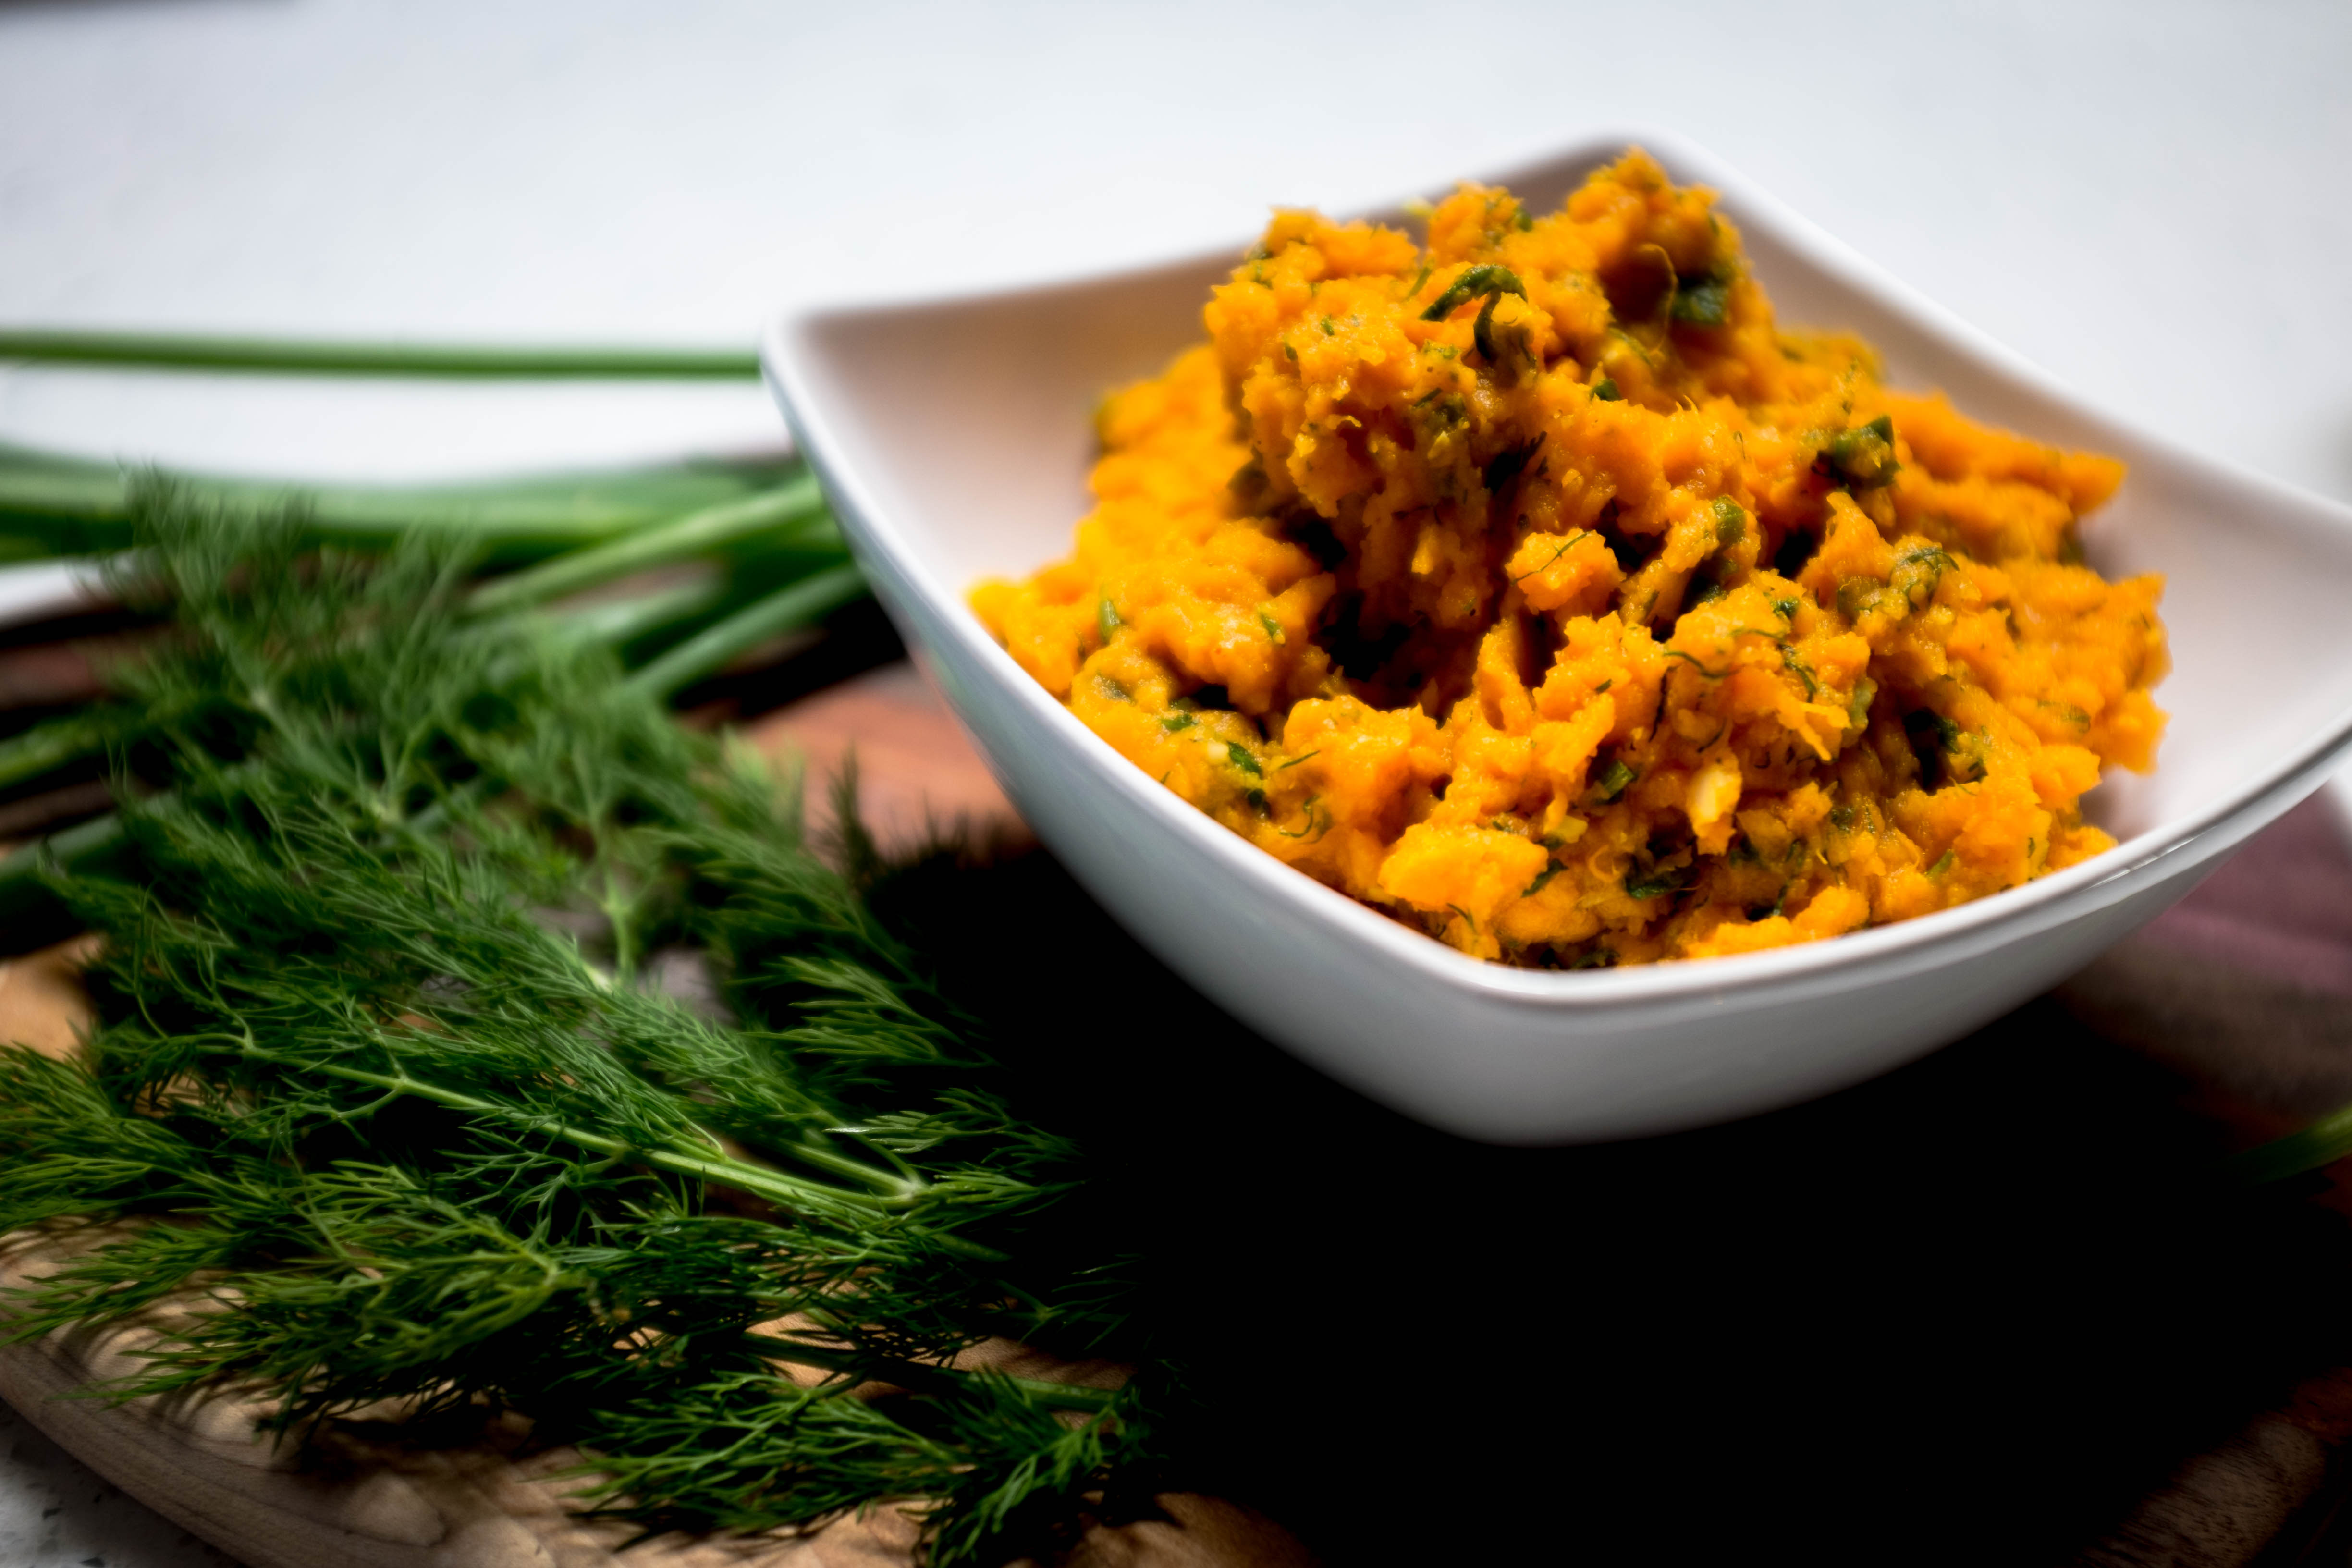
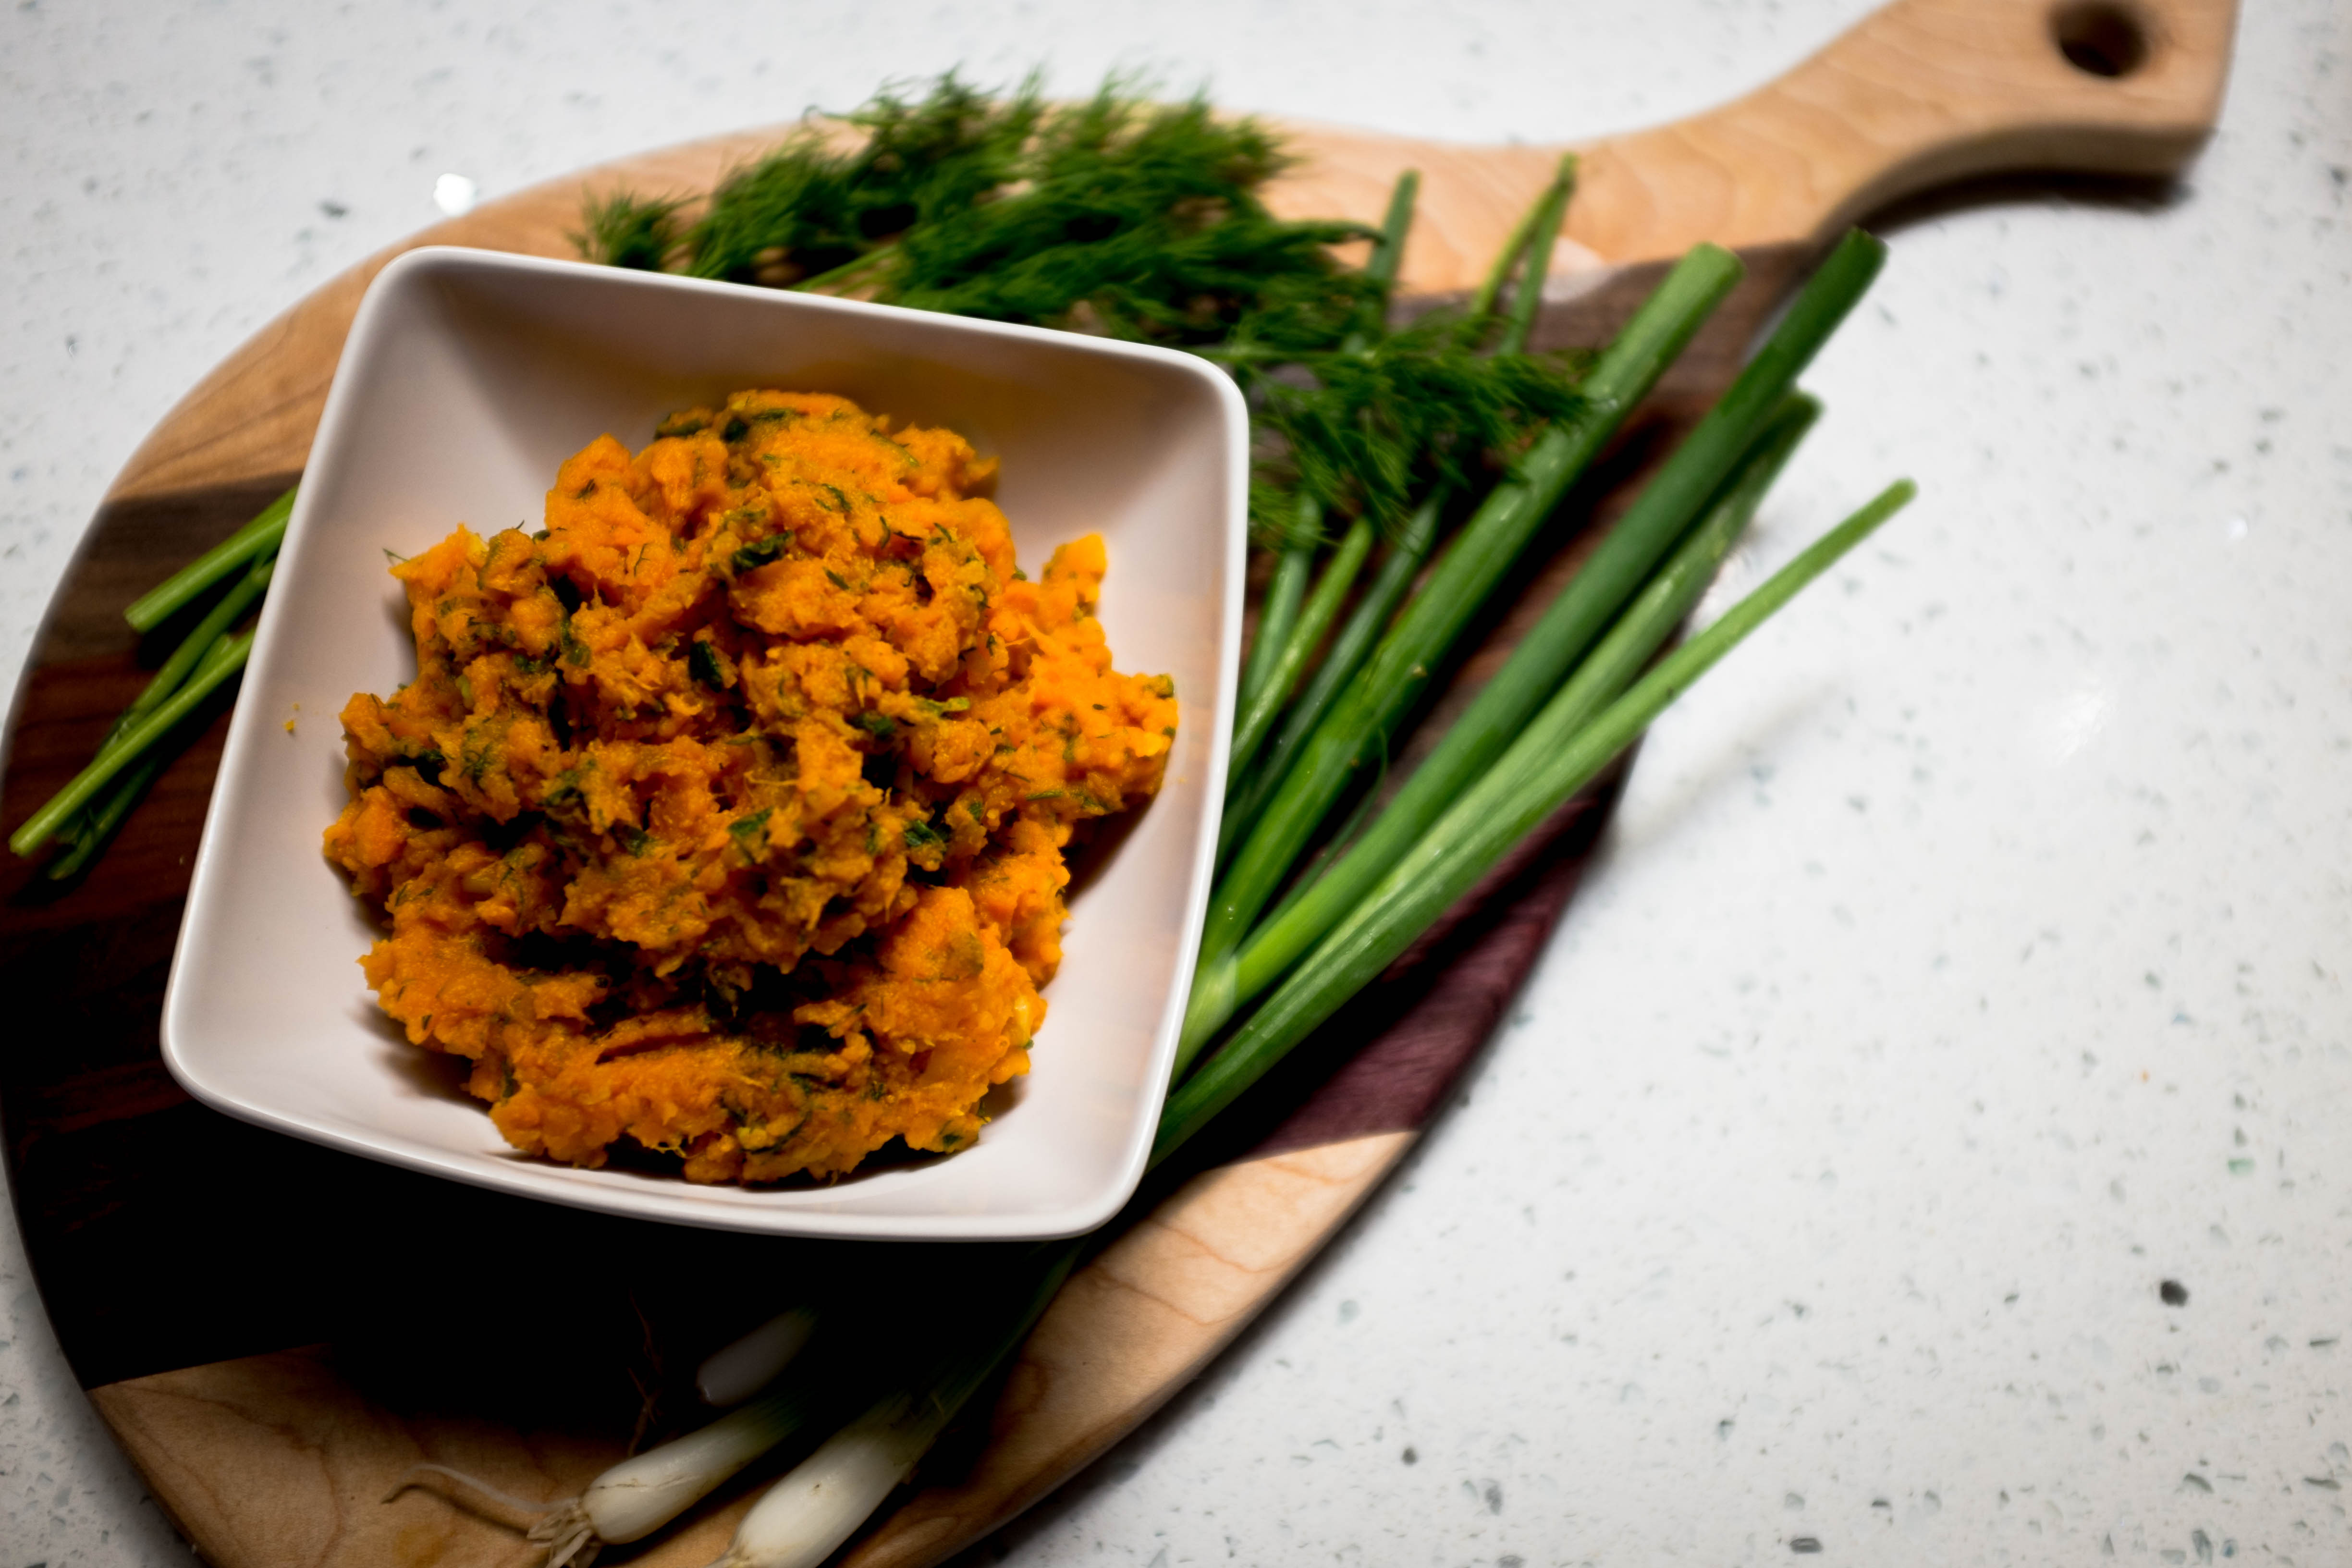
  • 1/2 tsp fresh or dried herbs (I used fresh dill and a dried herb mixture from Trader Joe’s)
  • 1/2 handful of baby spinach
  • 1 slice of toast

Directions:

  1. Heat olive oil in a nonstick pan on medium heat until warm. Add toast to one half of the pan, and add the spinach to the other.
  2. While the spinach and toast are cooking, whisk eggs with tumeric, curry powder, herbs, salt, and pepper.
  3. When the spinach has begun to wilt (about 1 minute), flip the bread to brown the other side.
  4. Remove the bread after it’s browned, laying it on a plate, and add the scrambled egg mixture to the pan, and turn off the heat completely.
  5. Stir the eggs around as curds begin to form, and when the eggs are at the desired doneness, remove them from the pan and plate them on your toast.
  6. Sprinkle smoked paprika powder on top of your eggs, and any other garnishes you want to incorporate (I also sprinkled on some Maldon salt, because that makes almost everything taste better).

Notes:

  • Scrambled eggs are best cooked at low temperatures, and will continue cooking even after they are removed from the pan because of the heat that they retain, so it’s best to remove them when they’re a little runnier than you want them to be in their final stage.

Gado Gado with Spicy Almond Sauce

About a month ago, I happened upon this delicious hole-in-the-wall Indonesian restaurant in LA called Borneo Kalimantan Cuisine. I tried gado gado for the first time, which is one of Indonesia’s five national dishes. It’s essentially a light stir-fry served with peanut sauce, and I loved the depth of the dish–namely, the delicious sauce accompanying it. I had tons of veggies in my fridge that I wanted to use before they went bad, so stir-fry seemed like the perfect option to make use of everything. My favorite thing about this recipe is how customizable it is; it’s a solid way to use up veggies that you don’t want to throw out, but that you may not find another dish to incorporate into.

This recipe is gluten-free, paleo, keto, and can be made vegan (see modifications below).

Ingredients:

Stir Fry:

  • 3 tsp avocado oil
  • 6 cloves of garlic, minced
  • 1 small nub of ginger, minced
  • 2 medium red onions, diced
  • 2 cups shredded chicken breast
  • 2 medium bell peppers, sliced
  • 2 cups of green beans
  • 3 stalks of celery, sliced long
  • 3 tsp chili sauce
  • 4 tbsp coconut aminos

Sauce (whisk all of these ingredients together):

  • 1/4 cup nut butter (I used almond butter)
  • juice from 1 lemon or lime wedge
  • 1 tbsp coconut aminos
  • 1 tsp sriracha hot sauce
  • 1/2 tsp coconut sugar

Garnish (optional):

  • Lemon or lime wedge
  • Fresh cilantro
  • Fried shallots
  • Crushed peanuts

Directions:

  1. In a large pan, heat the avocado oil on high heat, and saute the garlic, ginger, and onions. This helps create some nice aromatics for the rest of the ingredients.
  2. Add shredded chicken breast, then remove these two from heat and set aside.
  3. Add the rest of your vegetables, tossing and sauteing frequently to make sure everything is cooked through.
  4. After about 5 minutes of cooking, reincorporate the chicken mixture that you set aside earlier.
  5. Add the coconut aminos and hot sauce to the pan, stirring to combine everything. Keep tasting, salting, and adding coconut aminos and hot sauce little by little to get the flavor you want!
  6. Serve over rice, drizzling a few spoonfuls of the spicy peanut sauce over the dish, and garnishing with some fresh cilantro, fried shallots, and crushed peanuts.

Modifications:

  • To make this dish vegan, simply omit the chicken. Tofu also works if you still want some protein in the dish.
  • You can essentially use any vegetables that would work well in a stir-fry; ones that have lower water content and cook quickly. I would suggest: bean sprouts, cabbage, or bok choy

Charred Shishito Peppers (GF, Vegan, Paleo)

Some days I feel painfully lazy when it comes to cooking dinner. Though I usually see the kitchen as as place of solace, and my time to relax, there are evenings where I’m either working late, or want to do something else, which prompts me to look for a quick, easy recipe.

Shishito peppers are incredibly versatile, and there are so many ways they can be prepared. The form that most people will be familiar with encountering them in is also their simplest–charred, salted, and a bit deflated. A common way to serve shishito peppers at Japanese restaurants is to lightly dress them in soy sauce, but they taste just as delicious when the soy sauce is swapped out for its gluten-free replacement, coconut aminos. Shishito peppers can be found at Trader Joe’s, Whole Foods, and Asian supermarkets, and they are relatively affordable.

With this method of cooking shishito peppers, you can leave the peppers on the pan while you’re reading a book, working away, or watching TV. If your pan’s sounds are within earshot, you’ll hear a satisfying pop from the peppers are they char and deflate, which is exactly what you want to achieve that blistered, smoky texture.

Beautifully blistered peppers

Ingredients:

  • Shishito peppers (I emptied a whole bag from Trader Joe’s into my skillet)
  • Coconut aminos
  • Apple Cider Vinegar
  • Coconut sugar
  • Olive Oil
  • Coarse sea salt (I swear by Maldon)

Directions

  1. Drizzle the pan with olive oil, and heat it over medium heat. I recommend using a cast iron skillet for these peppers, as it tends to flavor and cook the peppers more thoroughly due to cast iron’s heat retention capabilities.
  2. Once the oil is hot, but not yet smoking, add the peppers to the pan. Make sure they are spread evenly, with each pepper making some contact with the surface of the pan. The trick here is to refrain from touching the peppers until they are ready to be turned.
  3. The peppers will cook slowly, and will expand, pop, steam, and deflate. Once they begin doing this (around 5-7 minutes), use a pair of tongs or chopsticks to turn them, one at a time. They should be significantly charred on one side, and flipping them will introduce the same lovely color on another side.
  4. Sprinkle some sea salt over the peppers.
  5. Let the peppers sit in the pan for another 4-5 minutes, until they are deflated. I like to take the chopsticks or the tongs and help pop the peppers that haven’t been able to deflate on their own.
  6. Transfer the peppers to a plate covered with a paper towel to soak up excess oil.
  7. While the peppers are cooling, combine a few tablespoons of coconut aminos, a dash of apple cider vinegar, and a few pinches of coconut sugar. I taste test as I go, and tweak ratios when creating this marinade.
  8. Remove the paper towel from the plate, drizzle your marinade over the peppers and toss them lightly to combine.

Herb and Garlic Sweet Potato Mash (GF, NF, Vegan, Paleo)

It’s been a long time since my last post, hasn’t it? Since my last post back in November, a handful of other priorities have surfaced in other areas of my life that brought about a wave of reflection on how often I wanted to post new recipes and commit to sharing new culinary experiments. At the end of the day, being in the kitchen is like coming home and sinking into a warm bath; my muscles relax, and my stress dissolves as I rhythmically rock the blade of my knife over sprigs of fresh herbs. The kitchen is a place where I can create love without restriction, and share it with others. When I’m experimenting with a new creation, there’s no pressure to produce or impress. Ultimately, I decided that the cooking content on my blog should reflect a similar philosophy; beyond being a joy to make, and a joy to consume, there’s nothing else that I really want to define the food here.

With weekdays that are typically very full and demanding of time, I love carving out time for a slower brunch on the weekends, consuming it with my nose in a book, and taking my time savoring each bite. Slower brunch usually involves poached eggs and mashed avocado, because those are two breakfast staples that I think taste entirely different when made fresh, and simply aren’t indulgences I can afford during my work week. However, instead of spreading the avo on toast like I normally do, I was feeling a bit adventurous today, and decided that I wanted to pair my favorite duo with a carb source that typically isn’t seen alongside avo and poached eggs: sweet potato!

Sweet potato isn’t usually found in the same dish as mashed avo and poached eggs, because it can be tricky to make the sweet potatoes in a way that complements the two other savory items. This presented me with a fun little challenge: how would I be able to make savory sweet potato? The answer is deceptively simple: a boatload of herbs, garlic, and seasonings. The beautiful thing about this recipe is that it’s easy to customize based on whatever herbs you have on hand. I used scallions and dill, but there’s no hard-and-fast rule to follow here. It’s a great way to clean out your fridge and use up some remaining fresh herbs that seem like they’re on the verge of going bad. I will say that I think using fresh herbs and garlic, as opposed to pre-minced garlic and dried herbs, folds in an unmistakable savory aroma. And don’t be afraid to use a lot of garlic and herbs, because the sugars in the sweet potato will dominate the flavor profile otherwise.

Cook time: 30 minutes

Ingredients:

  • 2 sweet potatoes
  • 6 cloves of garlic
  • 6 sprigs of dill
  • 6 sprigs of green onion (scallions)
  • Paprika powder
  • Onion powder
  • Tumeric powder
  • Apple cider vinegar
  • Salt and pepper

Instructions:

  1. Wash, peel, and cube the sweet potatoes. Some people like the skin of the potatoes in the mash, so you can also leave it on for more texture.
  2. Place the sweet potatoes in a large pot (I used a Dutch oven), and cover them with water. In order to shorten the cooking time, I use an electric kettle to boil the water separately. Once the water is boiling, reduce the heat to medium so that the water is a gently rolling boil, and let it cook uncovered until the potatoes are soft enough to easily slide a fork in and out (roughly 10 minutes).
  3. While the potatoes are cooking, mince the garlic, and roughly chop the herbs. I only used dill and onion in this recipe, but you can honestly use anything you want!
  4. Drain the potatoes and transfer them back into the same pot. Using a fork or spatula, mash the potatoes, which should be easy if they’re cooked enough.
  5. Fold in the apple cider vinegar, herbs, and spices (paprika, tumeric, onion, salt, and pepper), adjusting the seasoning ratios to your liking.

That’s it! This is such a versatile, simple side to make that pairs well with just about anything. Use it in place of white mashed potatoes when serving a steak. Spread it on a slice of toasted rustic bread. Layer some smoked salmon and capers on top of it, drizzled with a bit of lemon juice. This morning, I made my favorite avocado mash (recipe coming soon!), and poached an egg on top, letting all that yolky goodness bind the different textures and flavors together. It was one of the best slow brunches I’ve made in ages.

If you try this recipe out (or do any variations on it), let me know in the comments below 🙂 Happy lazy Sunday brunching.

Spiced Persimmon and Fig Muffins (GF, NF, Paleo)

Fall is in full swing, and it’s my favorite season for several reasons. Not only do the leaves change color and introduce stunning shades of yellow, orange, and red to the scenery outside, but the produce available in supermarkets now includes fun, seasonable items: different types of squashes, pumpkin, and fall fruits inspiring bursts of creativity in my kitchen.

Of all the fall goodies to feel excited about, persimmons are my absolute favorite. I grew up eating both types of persimmons (Fuyu and Hachiya), and my dad is very enthusiastic about drying persimmons to snack on. It’s fairly common to see dried Fuyu persimmons topped with powdered sugar eaten as a snack in China, and I certainly had my fill of sugar highs from indulging in one too many per sitting when I was younger. Yep, I’ve had portion-control problems since 1991.

There are two distinctly different types of persimmons. Fuyu persimmons are shaped like beefsteak tomatoes, and textured like apples. They have a slight crunch to them, and are mildly sweet. Hachiya persimmons are teardrop-shaped; when they’re ripe, they’re incredibly sweet and juicy, which makes them perfect for baking. It’s best to avoid eating these before they’re fully ripened, as their sharp taste usually causes an extremely dry mouth as a side effect. When using Hachiya persimmons in recipes, make sure that they’re soft; the persimmon should feel like a water balloon about to burst. To ripen them faster, place them in a brown bag with a banana for a day or two.

I’ve had a craving for muffins lately, and thought it’d be fun to incorporate persimmons into an easy recipe. I am also a huge fan of dried figs (as a snack, or as an ingredient in baking) because they bring a toffee, caramelized flavor when used in baking. For this recipe, I actually experimented with three variations, pairing the batter with Turkish figs, white mulberries, and cranberries. Though all three combinations turned out well, I thought the fig and persimmons pairing was the most delicious by far, so that’s the one I’ll be sharing, but honestly—get creative and replace the dried figs with whatever fruit you want! The beauty of this recipe is that there is room to experiment. The two magical ingredients in this recipe are Fuyu persimmon chunks, and dried figs. While Hachiya persimmons are better for incorporating into batter because they’re juicier and softer, biting into chunks of Fuyu persimmon in the finished muffin is absolutely divine. Dried figs, on the other hand, add a gooey layer of caramelized sweetness to the muffin.


Ingredients:

  • 2 1/2 cups gluten-free flour
  • 2 ripe Hachiya persimmons
  • 1/2 Fuyu persimmon, chopped into small pieces
  • 5 dried figs, chopped into small pieces
  • 1/4 cup honey, agave nectar, or rice malt syrup
  • 1/4 cup coconut oil
  • 2 large eggs
  • 2 tsp cinnamon
  • 1 tsp vanilla extract
  • 1 tsp pink salt
  • 1 tsp baking powder
  1. Preheat the oven to 350F.
  2. Microwave the Hachiya persimmons, honey, and coconut oil together in a bowl for 30 seconds on high.
  3. In a large bowl, mix together the microwaved mixture, vanilla extract, pink salt, cinnamon, baking powder. You can use a hand mixer to mix this, or manually mix by hand if you want an arm workout.
  4. Let the mixture cool to room temperature before mixing in the eggs, so the heat from the mixture does not cook the eggs. Popping the mixture in the fridge for 5-10 minutes can speed up the cooling process.
  5. Taste test your mixture, adding coconut sugar or stevia to sweeten as necessary. I wouldn’t sweeten with a syrup such as honey or agave here, as the mixture will already be extremely moist. As a rule of thumb, batters always taste sweeter than the finished product.
  6. Add the chopped Fuyu persimmon pieces, and 4 of the 5 figs, to the mixture by hand to preserve their shape and texture.
  7. Pour the mixture into baking cups, and top with the remaining fig pieces.
  8. Bake for 50-60 minutes.

When your muffins are finished baking, they will likely be very moist and slightly soggy in the center, so make sure to let them cool for at least 30 minutes. The juices from the Fuyu persimmon pieces seep through the muffin when warm, and it makes for glorious, gooey bites. When eating these muffins after they’ve completely cooled, take the taste to the next level by heating them in the microwave for 10 seconds prior to devouring.